
Home,
Auto Repair Library, Auto Parts, Accessories, Tools, Manuals & Books, Car BLOG, Links, Index

Troubleshoot Headlights
by Larry Carley copyright AA1Car.com
Your headlights are an essential safety system for nighttime driving & visibility. If your headlights are not working, or are not aimed properly, you might not be able to see the road clearly. Here are some suggestions on how to troubleshoot various kinds of headlight problems:
Problem: One headlight does not work
This usually means one of the headlight bulbs has burned out. Bulbs have a limited life that depends on the number of hours of use, and how much vibration they have been subjected to over time. The thin tungsten filament inside an incandescent headlight bulb will eventually burn out. The more nighttime driving you do, the sooner one or both headlights will fail. A typical automotive incandescent headlamp (halogen or regular) has a service life that may range from 600 to as much as 2000 hours of use. For the average motorist who drives 12,000 to 15,000 miles a year, that means replacing a headlight maybe every five or six years depending on how often the headlights are used. Driving on rough roads may cut that life short by causing the delicate filament inside the bulb to fail prematurely.
The Fix: Replace the burned out bulb
But before you do that, inspect the electrical connector on the back of the headlight carefully for damage, and see that it is not corroded or loose.
The headlight bulbs on most vehicles today are changed from the back of the headlight housing. The housing is a sealed plastic shell with the bulb and socket mounted on the back. The socket that holds the bulb usually twist-locks into the housing. Rotating it counterclockwise about one quarter turn will unlock the tabs and allow you to pull the bulb and socket out of the housing. Access on some vehicles is easy, but on others you may have to remove other components that are in the way, or even remove the housing mounting bolts and remove the housing before you can change the bulb. See your owners manual or the vehicle service literature for detailed instructions on how to replace a headlight bulb.
Once the socket has been removed from the headlight housing, you can pull the old bulb out of the socket and replace it with a new one (must be the same size and style as the original bulb).
Aftermarket replacement bulbs with slightly higher wattage ratings and/or tinting are available to upgrade headlight performance and improve nighttime and bad weather visibility.

CAUTION: DO NOT TOUCH THE GLASS ON A NEW HALOGEN BULB WITH YOUR FINGERS. The oil on your fingers will react adversely with the special quartz glass, and cause the bulb to burn out prematurely (sometimes within a few days or weeks after replacement!).
Hold the bulb by its plastic base, or hold the bulb with a tissue or cloth, or wear gloves when you install it.
After installing the bulb into its socket, test the bulb before you insert it back into the headlight housing. Turn the headlights on to make sure the bulb lights up. If it does, turn the headlights off, then insert the bulb and socket back into the housing. Remember to twist the socket about one quarter turn clockwise to lock it in place. Forget this step and water and dirt can find their way into the housing, causing corrosion and fogging the inside of the lens.
If the new headlight does not light up when you turn the lights on, the socket may be loose or corroded, or there may be a wiring problem in the headlight circuit. If the socket is corroded, spray it with aerosol electronics cleaner. If that fails to restore a good electrical connection, you will have to cut off the bad socket and splice in a new one. Applying a little dielectric grease to the socket before you install the bulb will help protect it against moisture and corrosion.
If you have an older car or truck with sealed beam style headlamps, these are usually removed from the front. This typically requires removing a trim ring around the headlamp, or sometimes a portion of the grille. A ring that is held by several screws must then be removed to free the headlamp so it can be pulled forward and disconnected from the electrical connector on the back.
 .
.

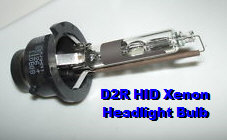
HID Xenon headlights and igniters can be expensive to replace.
Problem: One Xenon (HID) Headlight does not work
Diagnosis: The problem could be a bad headlight bulb, a loose bulb or corroded bulb socket, a bad ignitor, or a bad ground connection or wiring harness fault at the ignitor. High Intensity Discharge Xenon headlight bulbs do not have a filament, so if the bulb has failed it may be cracked or leaking. The bulb also requires a high voltage ignitor to turn it on and keep it glowing. On some applications, the bulb and ignitor are one unit and can only be replaced as an assembly. On others, the bulb and ignitor are separate components, and can be replaced separately. The bulbs are expensive to replace ($50 to $100), and the ignitors are even more expensive to replace (up to $200!), so you want to make sure you have correctly diagnosed the faulty part BEFORE you replace anything.
TIP: Swap the "good" bulb that is working on the other side to the headlamp that is not working. If the headlight now works, you know the bulb you removed was bad and needs to be replaced. If the headlight still does not work, try swapping the "good" ignitor module on the other side to the side that is not working. If the headlight now works, the problem was a bad ignitor, not the bulb. You need to replace only the ignitor and not the bulb. If the headlight still does not work, you have a wiring fault such as a loose ground connection, a bad wiring harness at the headlamp housing, or a corroded bulb socket.
Problem: Both headlights do not work
The Cause: Most likely no voltage to the headlights because of a bad headlight relay, fuse, module, headlight switch, dimmer switch or wiring fault.
To figure out what is causing your problem, start by inspecting the main fuse for the headlight circuit. See your Owners Manual for the location of this fuse. It is often located in the power center in the engine compartment, but may also be in the fuse panel under the dash.
 If the fuse has blown, replace it with a new fuse (same amp rating) and try again. If the fuse blows immediately, there is a short in the headlight circuit that will have to be found and repaired before the headlights will work. If the fuse does not blow and the headlights work, problem solved (for now). There may be in intermittent short or overload that caused the fuse to fail.
If the fuse if okay, use a volt meter or 12-volt test light to check for power at the fuse. Most headlight circuits are on (powered) all the time, so there should be voltage to the power side of the fuse. No power at the fuse would indicate a wiring fault possibly in the fuse block or in the wiring between the fuse block and the battery. You will need a wiring diagram to trace the wiring circuit and find the fault.
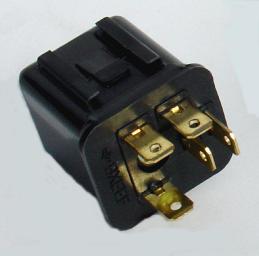 If the fuse is okay and there is power, the next check would be to find the headlight relay or control module. If the system uses a relay, pull it out and shake it. If anything inside rattles, replace the relay. Or buy another relay and plug that in to see if that restores power to the headlights.
On systems that use a module control module or daytime running lamps, about all you can do is eliminate other possibilities such as wiring faults, a bad relay or headlight switch first. If the module is getting power when the headlight switch is turned on, but the headlights fail to come on, the problem is likely a bad module. The module may be located in the front area of the engine compartment (common on Fords), under the dash or elsewhere in the front of the vehicle. Refer to the vehicle service literature to find the location of the module.
If the headlight relay or module do not receive voltage when the headlight switch is turned on, a bad switch is your problem. Switches get a lot of wear and tear, so it is not unusual for a switch to wear out after many years of service. Replacing a headlight switch can be difficult depending on whether is it located in the instrument panel or on the steering column.
If your headlights work on low beam, but you have no high beam, or they work on high beam but there is no low beam, the most likely cause
is a bad dimmer switch. The dimmer switch is integrated into the steering column mounted headlight switch on most vehicles, so if the dimmer is not working, you will have to replace the entire switch.
DO NOT attempt to replace a steering column mounted headlight switch without first disconnecting the battery and waiting at least 20 minutes for the capacitors in the airbag circuit to discharge. The steering wheel will have to come off to replace the switch. Crossing up the wrong wires in the steering column could set off the air bag and cause personal injury.
If a headlight switch looks like it will be difficult to replace, do not try to do it yourself. Take your car to a dealer or repair shop and have them replace the switch for you.
Problem: Headlights seem dim, or brightness changes when you rev your engine
The Cause: Most likely a charging system problem (bad alternator or slipping alternator drive belt).
Check the charging voltage with the engine idling. If the charging system is working properly, the voltage at the battery should be about 13.5 to 14.5 volts. If it is less than 13 volts, there is something wrong with the charging system.
Problem: Headlight beams do not illuminate road ahead very well
The Cause: Could be dirty headlights, fogging inside the headlight lens cover (moisture), fogging or discoloration of the plastic headlight cover, or headlights that are not aimed properly.
Look at the headlights. Dirt on outside of the headlights, or moisture inside the lens cover will reflect light back and reduce the brilliance of the headlights. Dirt can be removed by cleaning the headlight covers, but moisture inside the sealed housing means it is leaking. The plastic housing may be cracked somewhere or a gasket that seals the housing to the clear plastic cover may be leaking.
Moisture can be difficult to remove from a sealed housing. One trick is to drill a couple of small (1/8 to 1/4 inch) vent holes in the top of the headlight housing (not the lens) during dry weather. Park your car so the sun shines directly on the headlights. After a few hours (or days depending on how much moisture is inside), the water will eventually evaporate and vent out of the holes your drilled. Then seal the holes with silicone glue or plastic tape to keep the moisture out.
On older cars, the clean plastic headlight lens covers sometimes turn a dull, milky white color. The film is formed by sunlight beating on the plastic and breaking down the plastic. Sometimes, the film can be removed by polishing the headlights with a mild abrasive polishing cream. If the discoloration extends below the surface, however, replace the headlight housing.
Dealers charge a fortune for new headlight housings, so look for aftermarket reproduction headlight housings on ebay or online.
Poor headlight performance can also be a problem if your headlights are not aimed straight ahead. If the beams are aimed too high, too low or off-center, they will not illuminate the road very well. And if they are too far aimed to the left, they can blind or annoy oncoming drivers.

To check the aim of your headlights, park your car about 10 to 12 feet from a garage door or wall, and turn on the headlights. On low beam, both lights should be aimed straight ahead with the brightest area of both beams no higher the hoodline of your car. Then flick on the high beams to see if the brightest areas of both beams move up slightly (but not too high).
If the aiming of the headlights need to be adjusted, there are usually adjustment screws on the back or top of the headlight housing. If you cannot find the adjustments, refer to the vehicle service literature for how the headlights are to be aimed.
On older cars with sealed beam style headlamps, there are usually two adjustment screws that can be turned from the front of the headlamp. One adjusts the lamp left and right, and the other adjusts the lamp up and down.
Headlight Recalls
GM Headlight Recall - March 2022
General Motors issued a safety recall for 2010 to 2017 GMC Terrain SUVs because reflections produced by the headlight housings when on low beam can illuminate some areas with too much light, creating glare for oncoming drivers and increasing the risk of a crash. As of this writing, GM has not announced a fix for the issue. The recall number is N222363740 (NHTSA campaign number: 22V137000).
GM Headlight Recall - December 2014
General motors issued a recall for 316,357 SUVs and sedans, mainly in North America, because the low-beam headlights can stop working. If the headlamp driver module is not operating correctly, the low-beam headlamps and daytime running lamps can intermittently or permanently fail to illuminate. This condition does not affect the high-beam headlamps, marker lamps, turn signals, or fog lamps.
The GM vehicles recalled include 2006-2009 Buick LaCrosse sedans; 2006-2007 Chevrolet Trailblazer, GMC Envoy and Buick Rainier SUVs; and 2006-2008 Saab 9-7X and Isuzu Ascender SUVs.
Acura Headlight Recall - July 2014
Acura recalled 14,078 2013-2014 ILX vehicles for a potential fire hazard with the halogen projector headlights. When a vehicle is parked with the engine running and the low-beam headlights on for an extremely long period of time, the headlight may overheat causing the plastic housing to melt and possibly starting a fire. Acura says it will replace the headlights for free.
Volkswagen Headlight Recall - March 2014
Volkswagen recalled 150,000 2012 and 2013 Passat models because the headlights may stop working if the hood is slammed shut. The jolt from slamming the hood can loosen the bulb housing inside the headlight assembly causing a loss of power to the headlight bulbs. This can turn on the "bulb-out" dash warning light for the headlights. VW's fix is to replace the original headlamp housing with an improved design at no cost.
Chevrolet Corvette Headlight Recall - March 2014
Chevrolet recalled over 111,000 2005 to 2007 model year Corvette coupes and convertibles because the low beam headlights may stop working because of overheating. When the engine is warm, the underhood electrical center housing can expand, causing the headlamp low-beam relay control circuit wire to bend slightly. After the wire is repeatedly bent, it can fracture and separate, preventing the low beam headlights from coming on.. As the housing cools and contracts, the low-beam headlamp function may return. This problem does not affect the high-beam headlights, marker lamps, turn signals, daytime running lights or fog lamps. GM said it will also repair 2008 to 2013 Corvettes that are not included in the recall if the owner has experienced loss of headlights for the same reason.
Honda Headlight Recall - October 2012
Honda recalled over 800,000 Civic and Pilot models because of a wiring fault in the headlight switch that can cause the low beam headlights to fail. Models recalled include 2002-2003 Civic, 2004-2005 Pilot models, 2002-2004 CR-V and 2003 Pilot.
Toyota Headlight Recall
Premature failure of the HID headlight bulbs and HID control units on 2006 to 2009 Prius models did not result in a recall, but Toyota did extend the factory warranty on these components for 5 years or 50,000 miles (from date of manufacture), which ever comes first.
Related Headlight Links (Offsite)
Philips Lighting Bulb Lookup for Your Vehicle
 Related Articles:
Performance Headlights
High Intensity Discharge (HID) Headlights
LED Headlamps
Headlight Frequently Asked Questions
Charging System Checks (alternator testing)
Troubleshoot electrical problems
Electrical Loads for Automotive Systems, Lighting and Accessories
Power Centers: Relays & Fuses
 Click Here to See More Carley Automotive Technical Articles
Be sure to visit our other websites:

AA1Car Automotive Diagnostic & Repair Help
OBD2HELP
ScanToolHelp
TROUBLE-CODES